Parameters involved in Sign In and Login Scripts
In previous post we have given the details of Generic Identity Sign In. Here we will give details on parameters involved in Sign in with the sample script which helps login functionality.
In the device we need to get the redirectUri, so that we can redirect the user to app home page on login. Below code retrieves the redirectUri and saves it in appData.
Code to get redirect URL
var urlParam = window.location.search.substring(1);
urlParam = decodeURIComponent(urlParam);
var appData = {};
if (urlParam !== '') { // fail-safe
var param, paramList = urlParam.split('&');
for (var index in paramList)
{
param = paramList[index].split('=');
if (param.length === 2)
{ // fail-safe
appData[param[0]] = param[1];
}
}
}
Code for redirect:
function login() {
//Use a call to your db and check user credentials are valid. If it is success set the user values to a property called 'uservalues'
function success(uservalues) {
var authToken = JSON.stringify(uservalues); // uservalues which is a collection of information to a specific user
window.location = appData.redirectUri + '?authToken=' + authToken;
else{
window.location = appData.redirectUri + '?error="Internal Error"';
}
}
AEM Mobile integration with third party applications
AEMM: How to create custom authentication
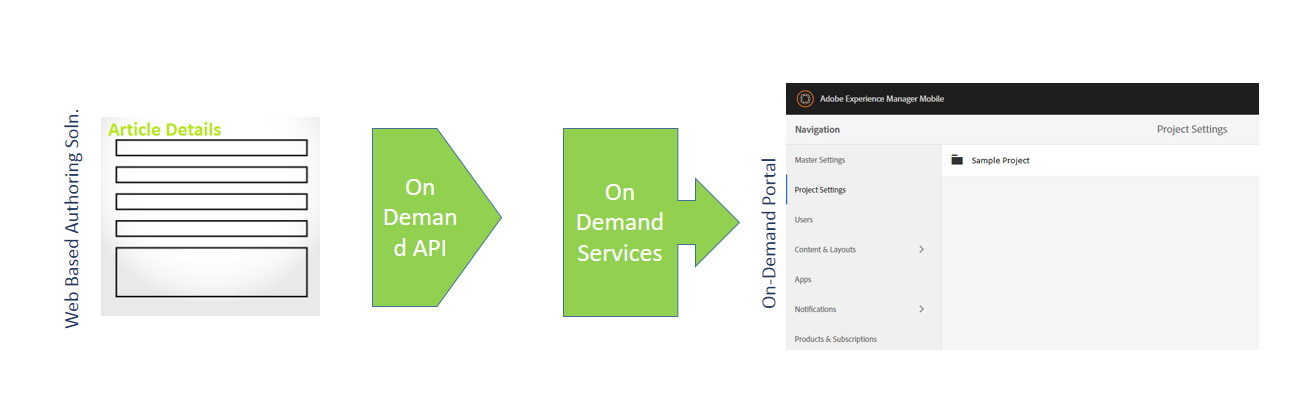
Various options in AEM integrated with AEM Mobile On-Demand Portal
Add/MAP user to AEM Mobile project
Create Article/Banner from AEM and publish it to AEM Mobile
Integrate AEM with AEM Mobile
Create an APP in AEM And Mapping with AEM Mobile On-Demand
AEM Mobile Interview questions for developers
Adjusting Home Navigation Menu from AEM Mobile On-Demand portal
In previous post we have given the details of Generic Identity Sign In. Here we will give details on parameters involved in Sign in with the sample script which helps login functionality.
 |
| Click on image to see it big |
- redirectUrl – the callback URL that the sign-in UI will need to use to redirect the user to the app based on successful or failure login.
- projectId – project ID mentioned in On-Demand portal
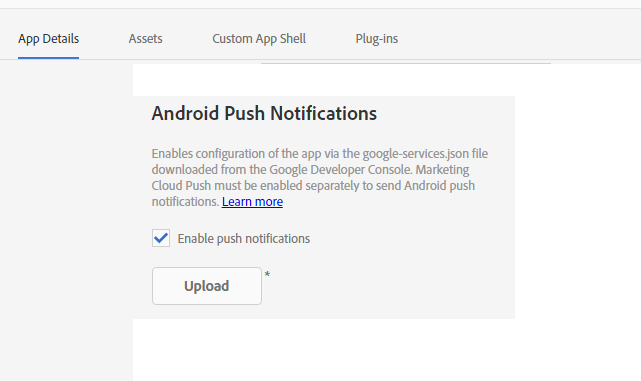
- appId – the app bundle ID mentioned in projects ettings
- appVersion – the version of the Runtime app
- uuid – application running device's UUID
In the device we need to get the redirectUri, so that we can redirect the user to app home page on login. Below code retrieves the redirectUri and saves it in appData.
Code to get redirect URL
var urlParam = window.location.search.substring(1);
urlParam = decodeURIComponent(urlParam);
var appData = {};
if (urlParam !== '') { // fail-safe
var param, paramList = urlParam.split('&');
for (var index in paramList)
{
param = paramList[index].split('=');
if (param.length === 2)
{ // fail-safe
appData[param[0]] = param[1];
}
}
}
Code for redirect:
function login() {
//Use a call to your db and check user credentials are valid. If it is success set the user values to a property called 'uservalues'
function success(uservalues) {
var authToken = JSON.stringify(uservalues); // uservalues which is a collection of information to a specific user
window.location = appData.redirectUri + '?authToken=' + authToken;
else{
window.location = appData.redirectUri + '?error="Internal Error"';
}
}
Read More:
AEMM: How to create custom authentication
Add/MAP user to AEM Mobile project
Create Article/Banner from AEM and publish it to AEM Mobile
Integrate AEM with AEM Mobile
Create an APP in AEM And Mapping with AEM Mobile On-Demand
AEM Mobile Interview questions for developers
Adjusting Home Navigation Menu from AEM Mobile On-Demand portal