Friday 17 February 2017

Create an APP in AEM And Mapping with AEM Mobile On-Demand


Create an APP in AEM And Mapping with AEM Mobile On-Demand Portal

To work with AEM Mobile On-Demand Portal, we need an app created in AEM.
Mobile Apps dashboard(http://localhost:8080/libs/mobileapps/admin/content/dashboard.html) collectively holds all mobile apps in AEM. To publish or sync a content between AEM and AEM Mobile, an app is necessary at AEM and a mapped project in AEM Mobile. Consider we already have a project in AEM Mobile, and need to link it with AEM.

There are two steps required to sync AEM and AEM Mobile.

1) Creating an On-Demand app in AEM 6.2
2) Link the AEM 6.2 APP with AEM Mobile On-Demand Project

Steps
 
>>Creating an On-Demand app
In AEM 6.2, go the Mobile section as shown below.
Click Create > App. The select template "AEM Mobile runtime", click on 'Next'


Enter app properties such as Title, Name, Description.


Ensure the app properties are matching with the properties used in the AEM Mobile On-Demand Portal, and click Next.

>>Link the AEM 6.2 APP with AEM Mobile

Under 'Manage Connection', map the AEM APP from section 'Select an Experience Manager Mobile Config', with AEM Mobile project from section 'Select an existing Experience Manager Mobile Project' as shown below.


Once the connection is successful, the 'Manage Connection' section looks as below.


Now we will be able to sync data/content between AEM app and AEM Mobile On Demand Portal.


Test the configuration.

Assume we have some collection already created in AEM Mobile portal. Now Go to 'Manage Connection' > click on 'Import Collections', confirm the import pop up screen. You will be able to see the AEM Mobile On-Demand portal collections imported into AEM environment with a success message.

Read More:

1. AEM Mobile Overview

2. AEM Mobile Integration with third party application for authoring

3. AEMM: How to create custom authentication

4.  AEM Mobile(AEMM) Applications - FAQ

5. AEM Mobile Desktop Web Viewer

6. AEM Mobile Access Protections at collection , article levels

Integrate AEM with AEM Mobile


Integrate AEM with AEM Mobile

The article is based on AEM 6.2. You may need to refer the url(https://helpx.adobe.com/digital-publishing-solution/help/configure-aem.html) for AEM 6.1 version integration.

How do we get AEM 6.2 Jar?
You may need to raise a request with Adobe in AEM License section for the same mentioning the partnership of your organization with Adobe.

Integrate AEM with AEM Mobile

AEM Integration with AEM Mobile On-Demand portal helps organizations to manage mobile content easily and work in more distributed way. Once the integration is done, we will be able to add content (Article, collections, banners etc) through AEM for the Mobile Application. We also can import existing content available in AEM Mobile On-Demand portal to our AEM Development environment.

To complete the integration, we need API access of On-Demand portal, which requires additional license from Adobe. Below given the details required.

  • API Key & Client Secret are credentials to access the API Gateway. (Refer Link and Raise a request for API Key from Adobe https://helpx.adobe.com/digital-publishing-solution/help/integrating-dps.html#apikey)
  • Device ID and Device Token are credentials to identify the API user. (Generate the Device details using above API received from Adobe then from URL https://aex.aemmobile.adobe.com/)

Note: Ensure the 'Adobe ID' used to get API access should match the 'Device ID' generation.

Once both steps are done, you will have,
  • API Key (IMS Client ID)
  • Secret Key
  • Device ID
  • Device Token
Note: API Key Expiry Time automatically gets extended once in use and expiry date is reached.

Integrate AEM 6.2 to work with AEM Mobile.

Follow below steps to integrate the AEM with AEM Mobile On-Demand Portal

In AEM click Adobe Experience Manager, and then go to Tools > Operations > Web Console.


In the new window, search for 'Experience Manager Mobile On-demand Services Client' and click the edit icon.


Enter the API Key (IMS Client ID) and Client Secret in the "Client Id' and 'Client Secret' as shown below and save it.

Now go back to AEM page, Tools > Deployment > Cloud Services. Search for 'Adobe Experience Manager Mobile On-demand Services', and click 'Configure Now'.


In the 'Create Configuration' pop-up window, enter 'Title', 'Name', and click Create.


Enter the 'Device Id' and 'Device Token' which was generated using the 'IMS Device Token Generator' to the pop up window 'Adobe Experience Manager On-Demand Services Account Configuration'. Once the 'OK' button is clicked we will be able to see the configuration saved.

How to Test the connection/configuration?

On the service which we have created, click on configuration > 'Edit' , the pop up window will have previously saved 'Device ID' and 'Device Token' and 'Test Device Configuration' on bottom. Click on 'Test Device Configuration'. If the connection is proper, we will get a message 'Connection Successful'.


If the connection was not successful, ensure that 'Device ID' and 'Device Token' values are correct, have not expired and are copied properly (by copying on notepad and removing any white-spaces).

Click 'OK', and then navigate back to the AEM window. You can see the AEM On-Demoand Cloud Service is enabled and 'Green'.


Read More:

1. AEM Mobile Overview

2. AEM Mobile Integration with third party application for authoring

3. AEMM: How to create custom authentication

4.  AEM Mobile(AEMM) Applications - FAQ

5. AEM Mobile Desktop Web Viewer

6. AEM Mobile Access Protections at collection , article levels

Create Article/Banner from AEM and publish it to AEM Mobile


Create Article/Banner from AEM and publish it to AEM Mobile

AEM Version 6.2

Once the AEM is configured with AEM Mobile account as mentioned in page, we will be able to import articles, collections banners etc from AEM On-Demand Portal. We can also create an article, banner, collection from AEM and publish to AEM Mobile on-demand portal. The synch method is quite easy to follow.

Let us see how to create a banner in AEM and publish it to AEM Mobile. Creation / updation of article method remains same as in banners.

In section 'Manage Banners' , click on 'Create Banner' as shown below.
[Click on image to see it big]


Now go through the screens and fill out all mandatory fields as shown below. Ensure we are clicking on 'Next' to fill out various sections like 'Properties', 'Advertisement', 'Images', 'Collections'. In final screen select the collection where the article/banner to be linked with.


Once we click on 'Create'; on final screen we will get confirmation 'Banner Created' with option to view new banner.


We will have various options like publish, unpublish,Add to a collection, Unlink from collection, upload delete etc for an article.

Also we can view and change the properties further.

Now the Manage Banners section list out all the banners which are created using AEM or through AEM Mobile on demand portal. Section 'Source' specifies the source of content creation.
It also says the advertisement details, whether the article/banner is published etc.


Individual articles/banners can be published by selecting it as shown below below.


Read More:

1. AEM Mobile Overview

2. AEM Mobile Integration with third party application for authoring

3. AEMM: How to create custom authentication

4.  AEM Mobile(AEMM) Applications - FAQ

5. AEM Mobile Desktop Web Viewer

6. AEM Mobile Access Protections at collection , article levels


Add/Map user to AEM Mobile project

We need to add multiple users to AEM Mobile account in order to deliver shared development environment and multiple project maintenance. In addition to this AEM integration with AEM Mobile also requires a user to be mapped with a project, preferably a dedicated user.

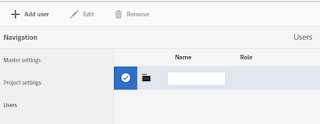
To do this, we have to login to On-Demand Portal http://aemmobile.adobe.com , click on users from left navigation, select the project which user needs to be mapped, then click on (+) Add User enter the user details (Users Adobe id mapped email) and submit.

Now select on 'Custom' drop-down so that we can immediately map the user access with the assigned project.


There are multiple sections where user can get access on as below.

    Click on image to see it  big
  • Administration

  • Application Development
  • Content
  • Notifications
  • Products & Subscriptions


Select appropriate check boxes according to the requirement and save the selection. The new user with specific access is mapped to the project now.


Any time the user permission can be edited by >Users> selecting the user then edit.


Read More:

1. AEM Mobile Overview

2. AEM Mobile Integration with third party application for authoring

3. AEMM: How to create custom authentication

4.  AEM Mobile(AEMM) Applications - FAQ

5. AEM Mobile Desktop Web Viewer

6. AEM Mobile Access Protections at collection , article levels

Various options in AEM integrated with AEM Mobile On-Demand Portal

Various options in AEM integrated with AEM Mobile On-Demand Portal


'View Properties' : This helps to view and edit the content settings for article, banner and collection.

'Upload' : Upload helps to upload the newly created/ modified article/banner/collection to AEM On-Demand Portal.

'Add to' : Specific to articles & collections. The selected article gets added to a collection which is mentioned in next step.

'Publish': Helps publishing the content to AEM Mobile and directly to an APP.

'Un Publish': Helps un-publishing the content from AEM Mobile and directly to an APP.

'Unlink': Unlink the selected items link between local(AEM) and remote instances of the content.

'Delete': Delete the item from AEM Mobile. On clicking 'Delete' provides an optional checkbox to delete item from 'AEM' also.


'Upload Shared Resources': This helps to upload the HTML common resources of the App of AEM to the common HTML on Experience Manager Mobile.

'Preflight': This helps to preflight all content, collections and layouts on device using a preflight app created from Experience Manager Mobile.

Change the configuration of AEM, AEM Mobile mapping
Clicking on gear icon to update the configuration as shown below section.

Go to the mapped AEM Mobile account from AEM by clicking on 'dots' as shown below.

Click on image to see it big

Read More:

1. AEM Mobile Overview

2. AEM Mobile Integration with third party application for authoring

3. AEMM: How to create custom authentication

4.  AEM Mobile(AEMM) Applications - FAQ

5. AEM Mobile Desktop Web Viewer

6. AEM Mobile Access Protections at collection , article levels

AEM Mobile Search

All what you need to know about AEM Mobile search

AEM Mobile search functionality
AEM Mobile provides a search feature for its app on menu bar once enabled. When you enable search indexing, article metadata is indexed on article creation.
This is a one time 'on' service which cannot be disabled once enabled. The content gets indexed from then. It can be individually enabled or disabled for different type of apps like 'production app' or preflight.

How to enable search in menu bar of AEM Mobile app?
Go to project settings> Select the project , click on 'Edit Project' from top left corner, select the tab 'Search'


I have enabled the search but I am unable to get results.

To enable search in your mobile app, you must rebuild it by selecting the app, clicking the edit icon, and clicking Submit.

What data is searchable in AEM Mobile?

Article metadata gets indexed in search (which are public facing). Internal properties such as 'Internal Keywords' or 'Article Name' are not indexed. Based on metadata of published articles, for e.g. title, category, author, department etc. If an articles metadata field includes the search string, the article appears in the list of search results.

Note: Search index also does not cover selection items such as 'Metered' (Property of Article Access) or 'High' (Property of Article Importance) - which are internal properties. Items tagged with 'Restricted' are hidden from search results unless the user is signed in and has access to it.

Search and indexing language configuration

Search configuration provides option to configure the index language at project level and article level. We can edit individual articles to override the default project language setting at lower levels. During content search, an article will appear in search results only if its language setting matches the device language setting. For e.g., if the device language is German, articles indexed in French language will not appear in search results.

What is the template layout of search? 
Default Layout in the Layout Templates section of the Portal is used to display search results. It can be changed by modifying the default layout to a specific layout as per the requirement.
Read More:

1. AEM Mobile Overview

2. AEM Mobile Integration with third party application for authoring

3. AEMM: How to create custom authentication

4.  AEM Mobile(AEMM) Applications - FAQ

5. AEM Mobile Desktop Web Viewer

6. AEM Mobile Access Protections at collection , article levels

Create & Sign Android apps for AEM Mobile on Windows OS(.apk files)

Create & Sign Android apps for AEM Mobile on Windows OS(.apk files)

Go to On Demand portal 'Apps' click on 'create' button select the type of app which you want to create (android)


Fill out basic mandatory fields. At present the mandatory fields are given below.

App Details : App Name, Bundle ID are mandatory
Assets Tab : App Icon

Once basic fields are entered, click on 'Submit', this creates an unsigned version of your AEM Mobile app.


Android app creation 

To create an installer we need below requirements in addition to Java (version 7 or later) installed on our machine.
  • The unsigned .apk file downloaded from the Apps section of the Portal.
  • A valid .p12 certificate for signing Android apps.

Create a .p12 certificate 

If you have java installed and configured on your windows machine, just enter below line on command prompt and press enter(by replacing 'yourcertificatename' with a proper name)
keytool -genkey -v -keystore yourcertificatename.key.p12 -alias alias_name -keyalg RSA -storetype pkcs12 -keysize 2048 -validity 10000

You now will have a certificate created on your windows/users/ folder.

Download the Unsigned app from 'Apps section'

Click on image to see it big


Download the AEM Mobile Signing Tool.  Click on icon in the upper right corner of the Apps section(Both iOS and Andriod works on same tool).

Install the Signing tool


Launch the App Signing Tool

Enter the details of the app to be signed, certificate to be referred while signing, with its password, click on 'Sign application'


A new app is created at the same location as the source app which is signed.


Move the signed app onto your device and install it, you will have the app installed on your device.

You can also submit the signed app to the android or iOS store.


Debug

If you face any error in signing the app, you can go to Signing in tool installed directory, 'AEM Mobile Signing Tool', open 'aemm-sign-tool.log' file in notepad and search for any error.

Read More:

1. AEM Mobile Overview

2. AEM Mobile Integration with third party application for authoring

3. AEMM: How to create custom authentication

4.  AEM Mobile(AEMM) Applications - FAQ

5. AEM Mobile Desktop Web Viewer

6. AEM Mobile Access Protections at collection , article levels